
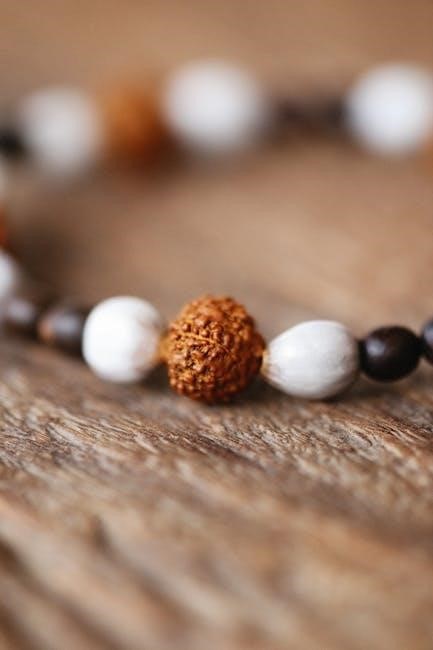
Tila bead bracelets are a popular DIY jewelry project, offering endless creativity and style. They utilize Miyuki Tila beads, small, square beads with two holes, perfect for versatile designs.
Known for their vibrant colors and flat shape, Tila beads allow for intricate patterns and textures. They are ideal for both beginners and experienced crafters, making them a favorite in bead weaving.
What Are Tila Beads?
Tila beads are small, flat, square-shaped beads with two holes, typically made from glass or seed bead materials. Originating from Miyuki, a renowned Japanese brand, they are known for their vibrant colors and smooth texture. Their dual holes allow for versatile stitching patterns, making them ideal for bead weaving and jewelry projects. Tila beads are lightweight and durable, perfect for creating intricate designs. Their unique shape and hole placement enable crafters to create complex textures and dimensional effects, making them a favorite among DIY jewelry enthusiasts. Their popularity stems from their versatility and the endless creative possibilities they offer.
Why Tila Beads Are Popular for Jewelry Making
Tila beads are highly sought after in jewelry making due to their versatility and unique design. Their flat, square shape and two-hole construction allow for intricate stitching patterns and dimensional effects. Crafters appreciate their vibrant color options and durability, making them ideal for both casual and elegant designs. Tila beads are lightweight and easy to work with, suitable for beginners and experienced makers alike. Their popularity stems from their ability to create complex textures and modern aesthetics, making them a staple in bead weaving and DIY jewelry projects. Their adaptability ensures they can be used in various styles, from delicate bracelets to bold statements.

Materials Needed for a Tila Bead Bracelet
- Tila beads (Miyuki or similar)
- Stretch bracelet string or elastic cord
- Bracelet glue or E6000
- Straight pin or beading needle
- Scissors
- Measuring tape
Essential Beading Supplies
To create a Tila bead bracelet, you’ll need a few basic supplies. Start with Miyuki Tila beads, known for their vibrant colors and flat, square shape. A stretch bracelet string or elastic cord is ideal for a comfortable fit. You’ll also need bracelet glue or E6000 to secure knots. A straight pin or beading needle helps with threading, while scissors are essential for cutting the cord. A measuring tape ensures the perfect fit for your wrist. These supplies provide a solid foundation for crafting your Tila bead bracelet with ease and precision.
Recommended Tools for Tila Bead Projects
For a smooth Tila bead bracelet-making experience, gather essential tools. A bead spinner is handy for transferring beads onto wire or string. Scissors are necessary for cutting cord or thread. A measuring tape ensures accurate sizing. A straight pin or beading needle aids in threading beads. Optional tools include bead mats to prevent bead rolling and crimping pliers for securing knots. Tweezers can help with intricate designs, while a bead board organizes beads. These tools enhance efficiency and precision, making the crafting process enjoyable and stress-free. They are versatile and suitable for both beginners and experienced bead enthusiasts.
Understanding Tila Beads

Tila beads are flat, square beads with two holes, offering versatility in jewelry making. Originating from Miyuki, they are prized for their vibrant colors and sleek design, making them ideal for crafters seeking unique and modern beadwork.
Unique Features of Tila Beads
Tila beads are distinguished by their flat, square shape and two-hole design, offering exceptional versatility in jewelry making. Their dual holes allow for intricate patterns and secure threading, while their vibrant color range enhances visual appeal. Crafted by Miyuki, these beads are known for their durability and consistent quality, making them ideal for both novice and experienced designers. Their flat surface enables seamless designs, and their variety of colors and finishes provides endless creative possibilities. This unique combination of form and function makes Tila beads a favorite for crafting stunning and long-lasting beaded bracelets.

How to Choose the Right Tila Beads for Your Project
Selecting the right Tila beads involves considering color, size, and finish to match your design vision. Opt for beads that complement your bracelet’s theme, whether vibrant and bold or subtle and elegant. Choose sizes that align with the length and complexity of your project. Consider finishes like matte, glossy, or metallic to enhance the visual appeal. Ensure the bead quantity matches your pattern requirements. For beginners, starting with a small set allows experimentation. Mix and match colors or stick to a monochromatic palette for a cohesive look. The right beads will elevate your bracelet’s aesthetic and durability.
Step-by-Step Instructions for Making a Tila Bead Bracelet
To make a Tila bead bracelet, gather materials like Tila beads, stretchy cord, scissors, and a needle. Measure your wrist with a flexible tape or paper to ensure a comfortable fit. Thread the beads onto the cord, starting with a knot to keep beads in place. Arrange beads in your desired pattern, ensuring they are snug. Secure the bracelet with a reliable knot, such as a double knot, and trim excess cord. Optionally, add glue to the knot for durability. Avoid common mistakes like incorrect measurements or bead shortages. For extra flair, incorporate different beads or charms, adjusting the pattern as needed. With patience and careful steps, you can craft a beautiful Tila bead bracelet.
Measuring Your Wrist for the Perfect Fit
Measuring your wrist accurately ensures a comfortable and secure fit for your Tila bead bracelet. Use a flexible measuring tape or a piece of paper wrapped around your wrist to determine your size. Mark the point where the paper overlaps and measure the length with a ruler. Add a small allowance for the bead thickness and desired tightness. For stretchy bracelets, consider the elasticity of the cord when determining the final length. Proper measurement prevents the bracelet from being too tight or too loose, ensuring it wears evenly and looks professional. This step is crucial for a polished and enjoyable DIY project.
Threading and Arranging Tila Beads
Threading and arranging Tila beads is a straightforward process that requires precision for a polished look. Begin by cutting a length of stretchy cord or elastic beading cord, ensuring it’s long enough to accommodate your wrist measurement plus a small allowance for knotting. Thread the Tila beads onto the cord, using either one or both holes depending on the design. Arrange the beads in your desired pattern, ensuring they lie flat and evenly spaced. For intricate designs, consider using a bead spinner to organize the beads before threading. Once arranged, gently pull the cord to tighten the beads, ensuring a balanced and visually appealing layout. Secure the ends with a reliable knot and apply glue for durability.
Securing the Bracelet with a Reliable Knot
Securing your Tila bead bracelet with a reliable knot is crucial for durability. Start by tying a tight double knot at the end of the stretchy cord or elastic beading cord. For added security, apply a small amount of bracelet glue, such as E6000, to the knot. Allow the glue to dry completely before handling the bracelet. This step ensures the knot remains intact, preventing the beads from coming loose over time. For extra stability, you can also tuck the ends of the cord into the beadwork or use a crimp bead. This method guarantees a professional and long-lasting finish.
Adding Finishing Touches to Your Bracelet
Once your Tila bead bracelet is complete, add finishing touches for a polished look. Apply a small dab of bracelet glue, such as E6000, to the knot for extra security. Allow the glue to dry completely before handling. Trim any excess cord with sharp scissors, leaving a small tail. Tuck the ends of the cord into the beadwork to hide them and ensure a neat appearance. For added durability, consider sealing the bracelet with a fabric sealant or clear nail polish; These final steps ensure your bracelet is professional, secure, and ready to wear.
Tips for Beginners
Start with a bead spinner for easy bead handling; Use stretchy cord and glue to secure knots. Practice with simple patterns before complex designs.
Common Mistakes to Avoid
When making Tila bead bracelets, avoid tying knots too tightly, as this can cause the bracelet to pucker. Ensure beads are evenly spaced and aligned to maintain a professional look. Cutting the cord too short can lead to difficulty in securing the bracelet properly. Inconsistent bead arrangement may result in an uneven design. Forgetting to leave enough cord for knotting is a frequent error. Using low-quality materials can compromise durability. Avoid over-tightening the bracelet, as it may cause discomfort. Always double-check measurements to ensure a proper fit. Using a bead spinner can help prevent bead disorganization during the process.
Troubleshooting Your Tila Bead Project
If beads aren’t laying flat, check if the cord is too tight or too loose. Adjust tension evenly for a smooth finish. Knots coming undone? Try a double knot or apply a small dab of glue. Beads not aligning properly? Ensure they are threaded in the correct sequence. If the bracelet feels too tight, remake it with a slightly longer cord. Struggling with threading? Use a straight pin or needle to guide beads onto the cord. Measurements off? Double-check wrist size before starting. Practice makes perfect—don’t be discouraged by minor setbacks during the learning process.
Advanced Techniques for Tila Bead Bracelets
Explore intricate patterns by incorporating Superduo beads or herringbone weaving. Combine Tila beads with seed beads for textured designs. Experiment with multi-strand techniques for a layered look.
Incorporating Patterns and Designs
Experiment with advanced patterns using Miyuki Tila beads for a unique look. Try combining Tila beads with Superduo beads for intricate designs. Use herringbone or brick stitch techniques to create textured patterns. For multi-strand designs, weave strands together for a layered effect. Incorporate seed beads for added dimension. Explore geometric motifs or floral patterns by arranging Tila beads strategically. Use a bead spinner to organize beads efficiently. Secure your design with stretchy cord or beading thread, and finish with a dab of glue for durability. These techniques will elevate your Tila bead bracelet to a professional, eye-catching piece of jewelry.
Using Tila Beads with Other Beading Techniques
Tila beads can be seamlessly combined with other techniques like bead weaving, stringing, or embroidery. Pair them with seed beads for added texture or incorporate them into herringbone patterns for a modern twist. Try mixing Tila beads with Superduo beads for dimensional designs. For a bohemian look, blend Tila beads with natural materials like leather or suede. Experiment with wire wrapping or macrame for a bold statement. Using stretchy cord allows for easy bracelet making without a needle. These versatile beads adapt to any style, making them perfect for exploring diverse beading methods and creating unique, personalized jewelry pieces.
Creating Tila bead bracelets is a rewarding craft that combines creativity with simplicity. For more inspiration, explore tutorials, PDF guides, and patterns available online to enhance your skills and discover new designs.
Final Thoughts on Making Tila Bead Bracelets
Making Tila bead bracelets is a fun and rewarding DIY project that allows for endless creativity and personalization. With their vibrant colors and versatile designs, these bracelets are perfect for crafting unique accessories or thoughtful gifts. The process is accessible to both beginners and experienced crafters, making it an excellent way to explore bead jewelry. By following simple tutorials and experimenting with patterns, anyone can create stunning Tila bead bracelets that reflect their personal style. This craft is not only enjoyable but also a great way to relax and express creativity.
Where to Find More Tila Bead Tutorials and Patterns
For those eager to explore more Tila bead projects, numerous resources are available online. YouTube offers a variety of step-by-step tutorials, while websites like Orchid and Opal provide detailed guides. The Bead Place and Beebeecraft are excellent platforms for finding patterns and materials. Additionally, downloadable PDFs and blogs dedicated to bead jewelry often feature Tila bead designs. Social media platforms and crafting communities are also great for discovering inspiration and tips; Whether you’re a beginner or an advanced crafter, these resources can help you expand your skills and create stunning Tila bead bracelets.